Showing posts with label DIY. Show all posts

Sunday, August 10, 2014

Bar Cart: let the boozy good times roll

Bar Cart: let the boozy good times roll

This summer has been all about the Artisanal, or craft, cocktail.   You may love a small batch brew, or have a go to beverage already selected but when the sun is hot and fruit is in season and plentiful, mixing up an herb infused crafty cocktail just feels right.  Lets be real, you are not going to find a watermelon lavender martini appealing in December and that natural pink hue is going to clash with your fall/winter burgundy nails.  You might as well live it up (in moderation) crafty cocktail style while there is summer remaining.

As a long time lover of the Old Fashioned  (http://liquor.com/recipes/bourbon-old-fashioned/) I can appreciate fresh fruit in a muddled drink.  This crafty cocktail trend is one I am happy to embrace.  Some of my favorites were featured on self.com (http://www.self.com/body/food/2013/05/summer-cocktails-under-200-calories-slideshow/1).  Summer refreshments that are all natural, low in calories, delicious, and just the right amount of boozy?  Yes please.  However, there is not a shortage of recipes if you are willing to put together a little elbow grease and the fresh summer flavors.

After a few months of many delicious concoctions that require refrigerated ingredients tickling my fancy, my kitchen counter was inadvertently transformed into a makeshift bar for easy mixing.  Apparently, I am not alone in this as the blogosphere is currently trending with decorative bar carts.  It’s a logical follow up to the craft cocktail craze.  Once again, a trend I am happy to embrace.  Sometimes the actual bar is just too far away.  Best to have a cart, on wheels that can be moved in close proximity to where ever you need it. 

Voila, my bar cart:


Let the boozy good times roll
I happened to have all of these goodies on hand employed in different ways in my house.  The cart was designed to hold a record player on top and records on the bottom.  I don’t have a record player that is not attached to speakers so this cart was just waiting for a party.  I happened to have plexiglass on hand for another project that I cut to fit each level to provide a flat surface for glasses and drinks.  You can never have enough glassware and alcohol, the fancier the better for the cart.  Ideally I would have a coordinating ice bucket and bar mixing tools but all in good time.  Vintage flare and flowers seem to be a must based on the blogs so I grabbed a few of those from around the house.  Beautiful.  My kitchen counter is clear again!


If you are thinking you also need one of these party makers you are in luck, it is also flea market and yard sale season.  If you aren’t sure where to start here are some ideas for what you will need:

  1. Some kind of cart on wheels.  The more creative you can get with this the better.  If all else fails there is always Ikea and spray paint.  This blogger fashioned an inexpensive bar cart with an IKEA cart, spray paint, and a little magic (http://www.self.com/body/food/2013/05/summer-cocktails-under-200-calories-slideshow/1) 
  2. Alcohol.  Start with what you like.  Many summer cocktails will call for cordials or flavored liquors.  These are fun and can jazz up a cart but there are many cocktail options.  You can focus on drinks made with your liquor of choice.  If you aren’t sure go for vodka. 
  3. Glasses.  I like a variety because certain cocktails do taste better in different glasses.  The variety is extensive.  At a minimum maybe some tall ones, and some short ones.
  4. Tools. You need a shot glass or other measuring device.  You need a muddler (not shown on my cart because it didn’t match), something for stirring, something for shaking, and something for straining.  If you don’t have them in your kitchen you also may need a knife, and a zester.
  5. Something to hold ice.  Ideally a bucket but really possibilities’ are endless.
  6. Flair.  This could be flowers, stir sticks, a fun book, its flare, it could be anything.


Happy cocktailing!

Here are some other examples:


Ten best bar carts (obviously they haven’t seen mine) http://camillestyles.com/10-best/10-best-bar-carts/?slide=1


Monday, June 2, 2014

This weeks manicure: short and sweet.

This weeks manicure

Are you loving all of the new mani trends?  I know I am.  Experimenting with colors, finishes, shapes, and patterns are all part of the fun. 

Granted, when being bold, you win some and you lose some. 

Examples:

Win some. 
Lose some.  Is that candy corn?


I am very excited for my manicure creation this week.  It is, on one hand, a classic with its bright cherry red color but on the other hand, it is new with a natural crescent at the cuticle.  Rather, it is both a play on a classic and new, on both hands.  It looks exactly the same on both hands… but you know what I mean.  The length is short and sweet, perfect for no fuss when applying sun tan lotion or digging in the garden.  With this weeks manicure, jazz hands may be making an appearance in my near future.

This weeks manicure: short, sweet, a new classic, and fun. 

Sunday, March 23, 2014

Ode to my new favorite Mani

Moon mani,
moon mani.
On all my nails.
What do the gentle
Crescent shapes entail?

D.I.Y.
D.I.Y.
Do it with ease.
Half circle stickers
Make crescent shapes a breeze.

File nails.
Buff nails.
Cuticle clip.
Two coats nail envy
Avoiding brittle chips

Labels,
Labels,
Half on the nails.
Find them at staples
Maybe look for a sale.

Polish,
Polish,
Two coats of course.
Pick any color
Life’s too short for remorse.

Remove
Labels.
Pull them gently.
They may need shaping,
Guide polish intently.

Top coat,
Top coat.
On the whole nail.
Isn’t it pretty?

Cutting edge tips, no fail.

Saturday, October 15, 2011

Fall and its cool breeze

Trying to transition from summer to fall is always a challenge.  Not because of the change of textures, the need for layers, or difference in color palette but because I am never ready to see the foliage wilt and the temperature drop.  Fall is beautiful in a special way all its own but it is a precursor to the cold, and even more frustrating for me, the dry air and static.  
I find what often draws me into this transition and brings me the joys of fall are the new colors.  Often deeply saturated and rich, I cannot help but get interested.  Then, my attention diverted, surprise, its cooler and its fall.
I love the saturated electric cobalt and emerald hues this season.  They topped my “must have” list.  So much so that I hastily bought these Steve Madden pumps an entire size too large.  Thank you Dr Scholl’s massaging gel insoles (and your ability to stick to one another for stacking) and heel grippers.  A little ingenuity and the electric cobalt suede is cozy and in place.
With the back-to-school season I also found myself recalling the favorite days of new school supplies and new classes.  I thought of all the protractors, and rulers and geometry class.  Which then reminded me I have been eyeing the geometric trend for a while and it’s about time I bought a few pieces.  (Ok, all of this nostalgia happened in about twenty-seconds while shopping online, but it did occur.)  I picked up this Maggie London dress and thought, “What a perfect streamlined and work appropriate look!”  Thinking how striking the black and white would look with my new pop of saturated colorful pumps I was excited to dive into the newly emerging crisp air.
The outfit was a hit at the office.  I got immediate compliments from my few female coworkers, and I was productive and direct in my tasks, as I felt confident walking through the halls.... That is, until, I realized the seam that ran below the back zipper, dividing the back of the dress in two halves was quickly coming undone.  Unfortunately this realization came around noon when I noticed the cool draft of the new season on my rear, and upon examination in the restroom could see aforementioned rear through a two inch split.  When exactly this occurred was a bit of concern as I had spent my morning sauntering around confidently.  
After some searching, I was able to borrow a sewing kit.  I took the dress off in the restroom and repaired the hole.  When putting it back on I let out a frustrated and exasperated scream as a different five-inch spot of the seam came undone.  I quickly explained to the other women in the restroom that I was ok despite my scream, and repeated the process of stitching my dress together again.  Luckily the sewing kit had just enough white thread to secure the length of the dress.  Crisis averted.  However, my confidence was diminished as I spent the rest of the day hiding in my cubical attempting not to make any sudden or stretching motions.
This brings up a great lesson in sewing and wardrobe prep.  ALWAYS CHECK THE SEAMS!  Vintage and new this is often the first place a look unravels.  In this case the designer (by flaw or oversight) used a straight single seam stitched on a neoprene like stretch material.  The fabric had much give however the seam did not, and without reinforcement snapped leaving me ass-out at the office.
Not one to give up I am in the process of reinforcing all the seams in the dress.  There are several options for fabric with stretch that I will mention.  Take a look at a jersey seam in something you own.  You will notice there is a stitch that appears to form triangles and criss crosses over itself.  This is important to make sure that the edges do not unravel.  This is also an option for seaming to ensure that the fabric does not stretch beyond the hold of a single piece of thread.  Another option is to sew a separate fabric that does not stretch, or has equal elasticity to the thread, along the inside of the fabric at the seam to keep the stretch fabric from pulling the thread to its breaking point.  This later technique was used along the length of the zipper in the back of the dress but not continued along the remaining bottom portion of the dress.  I suspect this was left out in an attempt to keep the seam invisible, however, a more appropriate approach would have been to use a single back panel of fabric and not continue the seam the length of the dress, or to use a reinforcing stitch.  In any case I would rather have a slightly visible seam than a very visible rear.  
Hello fall.  May your static be minor, and your cool breezes be appropriately placed.

Tuesday, July 12, 2011

One Night, One Craft at the Cincinnati Contemporary Art Center

One Night, One Craft at the Cincinnati Contemporary Art Center


Tonight was yet another fantastic evening at the Contemporary Art Center!  If you have not had an opportunity to check it out, let me introduce you to “One night, one craft!”  This genius summer series each Monday night at the Contemporary Art Center provides a two hour opportunity to learn a new craft from a skilled artist with an adult beverage in hand surrounded by other creative artists in training, and no judgement.  Typical of the CAC, each evening is unique and a great time.  This is not your grandma’s craft night.    
To recap: 
June 6: The kickoff was an embroidery tutorial and demonstration by Cincinnati’s own Pam Kravetz http://pamkravetz.com/Site/Welcome.html 
You may remember Pam’s exhibit at the CAC, “Beauty Queen, Superhero, Peanut,” the larger than life fabric art interactive marionette figures on the sixth floor.  This creative queen (Pam) held court on the sixth floor as well keeping the session lively with interesting details about how she got her start and her current inspirations.  She was energetic in tutu and leg brace, and had no qualms about sharing details on how she created her signature beautiful details, vibrant colors, and visible rustic stitching.  Pam is as exuberant as her art and it was an exciting start to the series.
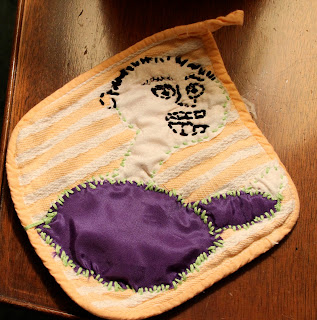
My creation.  This guy is still a work in progress.  He is hungry. 
He is going to be eating a cupcake.  This cupcake is Pam's creation

13th: Intro to wet and needle felting with The Shiny Brights.
An Australian rock band?  No. The Cincinnati Shiny Brights are an eclectic group with similar interests that periodically gather to socialize while they create crafts.  If you thought, “felt” was a synthetic square you cut up and glued in elementary school, prepare to be shocked because wool felting is an age old craft that far precedes polyester.  Wool felt is a non-woven fabric formed when sheep’s wool or animal fur is subjected to heat, moisture and pressure or agitation.  The shiny bright crew introduced two methods of felting, needle felting that is created by stabbing different colored pieces of felt into another, and wet felting, the process of dipping loose wool into soap water and rolling it into beads to use in many other crafts.  New to many of the attendees this was one shiny adventure with beautiful ends.

My felt ball and bead bracelet.  Also still a work in progress.

June 20th: Kalamkari fabric painting with Radha Chandrashekaran www.radartist.com
In the spirit of full disclosure I regrettably had food poisoning and missed this event.  But I learned from my new friends that this is an ancient technique of painting using a hand made brush made by wrapping fabric around a wooden skewer.  By holding the brush tip with the fingers and applying different amounts of pressure varying line thicknesses can be achieved.  It was apparently messy but very fun.  Totally disappointed I cannot give you more details.
June 27th: Book making with Annie Stephens www.anniestephens.com
Sewing together pages of paper, and two cardboard covers may sound simple but producing a decorative notebook that looks good and stays together is challenging.  The knotting method was calmly introduced by the energetic and multi talented Annie, and she patiently ran from table to table to assist with different skill levels of crafters throughout the evening.  While it was a challenging start there was also a great sense of accomplishment when leaving with a completed gift-able notebook. 

My first hand bound journal.  Still intact.  You may be receiving one of these as a future gift if I can get better at it.

July 11th: Sumi-e ink painting & yoga poses with Anne Ducharme 
This week was a little different from previous evenings with a focus on meditation through art and yoga.  The evening began with Anne guiding the group in meditation.  She taught a few yoga balancing methods and poses as a great way to clear the mind for inspiration.  Sumi-e ink painting focuses on the tools and on the process rather than the finished product.  There are many brush and ink washing techniques that can produce different images.  Letting go of a predetermined image provided surprising and interesting results.  The variety of crafter images varied from very dainty to broad strokes, very literal images and more abstract pictures.  It was as if each state of mind depicted differently on paper.  Anne was a calm encouraging influence and I left with a great start to my Sumi-e painting beginnings.

A sampling of my creative process.  The fish on the bottom left are Anne's work.

My three favorite works.  My meditative state is less calm, more movement.


Admittedly each week I do not leave feeling a master of each craft but I always leave excited by a new method of artistic expression to explore.  With a variety of materials to inspire creative minds, a relaxed atmosphere, and a friendly and enthusiastic crowd of attendees I continue to be impressed by the art created in this two hour period each Monday night at the Contemporary Art Center.

Upcoming opportunities to craft at the CAC:
July 18: Seed bombs with VisuaLingual
July 25: Woodworking and image transfer with Joel Armor and Joe Civitello
August 1: Mud cloth with Judy Dominic
August 8: Personalized Magnets with Cincy Craft Cartel
August 15: Henna tattoos with Sneha Nirody
August 22: Paper-craft with Jessica Wolf
Each week One Night, One Craft goes from 6 to 8pm and participation in some crafts may require paying a $5 materials fee.  Admission to the CAC on Monday evenings is free courtesy of Macy's.  Look forward to seeing you at the Contemporary Art Center!


On exhibit at the Contemporary Arts Center:
Currently the CAC is full with three ongoing exhibits to check out.  All three are impressive.
Maidens of the Cosmic Body Running: Majr Gazr
I continue to return each Monday after crafting to experience “Maidens of the Cosmic Body Running: Majr Gazr.”  It is a collective exhibit of work by Denise Burge, Lisa Sinders, and Jenny Ustick.  It incorporates expertly crafted hand made textiles, electronic and colorful video imagery, and trance like tones and repetitive relaxing whispers.  It is designed to be a multi sensory, participative exhibit dedicated to relaxing the participant.    
The relaxing effects of the combination of these influences is incredible.  All the elements of the exhibit purpose to “explore notions of utopia tied to feminism, nature, and spirituality.” Further description indicates the integration of the elements and craft, “Reference the Maidens’ notion of a female community; while the use of color, symbolism and textiles evoke the myriad of utopian communities that have emerged throughout the last century.”  Honestly, I was a little leery of that description initially.  I also was not sure how I felt about the community slippers.  My first visit, however, I had on incredibly uncomfortable heels and so while I was somewhat uncertain I quickly donned the slippers and grabbed a “map” illustrating the ways to participate in each aspect of the exhibit.  This first visit it was close to the museum closing and I was alone as I listened, watched, and became wrapped in the experience.  My stress melting away with the tones, images, and tactile influence.
Each time I visit I notice an additional element of the exhibit I did not in the past.  I later found the slippers are to protect the textiles as much as they are to add to the sensory experience.  Wearing shoes and walking on the hand made items would surely cause wear that would detract from the experience.  I find myself looking forward to visiting each week and am a little concerned how I am going to find the same stress melting effect once this exhibit has concluded.  
Hurry to experience this exhibit soon as it is only running through July 17th!
Matthew Monahan
The sculptures by Matthew Monahan are amazing to see.  His use of repurposed materials and the way he wields them into precise human form is totally impressive.  It seems his works are alive, eyes sparkling, muscles flexed, expressions expressive.  
The CAC website description so artfully describes this best, “Monahan’s sculptures seem to hover in a state of fleeting existence, projecting the illusion that the forces of nature could turn them back into unrecognizable rubble at any moment. His works succeed in engaging the viewer in a dialogue between contemporary and ancient; alien and disparate parts. His fragmented figures—with their active postures and facial expressions—convey the struggles of coming into existence in the present moment while carrying a sense of a past long gone.”  True.  Matthew Monahan’s work is worth a visit sometime before the exhibit conclusion on October 30th.  
Keith Haring: 1978-1982
This exhibit provides an exploration of Keith Haring’s work from his youth and early work through his height of popularity and some of his final works.  His efforts to make art accessible to all, and his broad quick intersecting lines helped to make him one of the “most iconic, influential and popular artists in the world.”  
This exhibit gives great insight into his artistic development, internal struggle, and immersion in the New York City Scene with rarely shown early work and some of his most notable images.  Personally I remember Keith Haring as I was first introduced to his work in first grade.  At the time his brightly colored, distinct human forms were being painted on city buildings and sidewalks in New York.  He must have been featured on Reading rainbow or something because I vividly remember sitting on the floor of Ms Ditkin’s (my first grade teacher) floor attempting to braid another girls hair and pay attention at the same time.  I remember liking the color usage the best. 
My early introduction to Keith Haring seems to have been quite flat with only an introduction to his work and a brief glazing mention of his death to AIDS.  What I did not remember being introduced to about Keith Haring in the calm afternoon of my elementary school art hour were his sexual influences, incorporated phallic symbols, and overwhelming drawings.  I was surprised to see some of his later work, sometimes violent red images of aliens and death.  It is funny how a purposely narrow sight, for a child or otherwise, can change the artistic impression of the patron.  Seeing this complete collection first hand with its large scale and detail is quite impactful.  This exhibit allows you to feel the challenges Keith felt in his shortened life, to understand his journey further, and it allows you to experience the impact of his broad brushstrokes and interconnected lines and elements.   

Monday, May 23, 2011

Orange Pumps


Osha orange pumps
I made these shoes.  The process was silver and orange waves of highs and lows.  The shoes started out a beautiful mirrored finish.  Tahari pumps, they were both comfortable, solid, and versatile.  I was dismayed when the mirror finish, after a good year of considerable wearing, rubbed off in a pattern tracing my toes.  I looked at this as an opportunity for recreation.
Experimenting with silver and gold leaf in recent projects I was convinced I could recreate the silver shine with leaf paint.  This was a disaster.  The silver leaf was more of a silver swirl than a shiny seamless finish and the sealing lacquer I applied as a top coat turned a puke like yellow.  Just gross.  
Impressed with the overwhelming pops of color swirling through my favorite fashion periodicals I thought of one thing, OSHA orange.  You know what I am talking about, the orange that is used to mark danger and construction guidelines.  What could be more eye catching?  I took the shoes in their silver yellow puke state to Home Depot where I consulted with a portly bearded man that barely looked at the shoes as I described my predicament.  His only word of advise was to sand the finish.  I thought this a little too simple and nontechnical but I trusted his guidance.  
after coat #1 note the dark spot on the left

Approaching the new orange shoe idea with gusto I purchased a hand held sander and removed all of the silver leaf paint (in a cloud of possibly toxic dust) and ruffed up the remaining mirrored finish.  I then took to applying several thin coats of the Osha orange paint.  Let me provide you with a caution: even if you paint on a box or disposable material, spray paint produces a cloud of small paint particles that can drift and paint other, not so closely, surrounding surfaces.  Luckily there was a rain before I started this project so my porch and patio furniture was wet and the orange mist easily washed off.  The first four coats looked good so i left them to dry.  Upon drying the results were less than exciting.  Splotchy, uneven, and generally unwearable.  They were not ready for my intended first wearing.  
painting in the grass.  coat #2

In sunnier weather my favorite spray painting location, the grass, was accessible.  Before giving up I decided to try a few more coats.  I took to applying another four thin coats and allowed the shoes to dry in the sun.  This was the final step needed for a stunning, even coat.  

making friends with orange shoes

Wearing the shoes the first time my toes were a little orange but I felt good.  As intended my creations are eye catching and fantastic.  Unfortunately the paint cracked the first time out.  It kind of looked attractive with the silver showing through the hairline cracks.  I have spray painted vinyl chairs before with much success and no cracking...that may have been a different type of paint.  With the second wearing many of the cracks gave way to chipping.  Still I don’t hate it.  They still grab attention, the silver peaking through almost makes me feel as though Tahari is erupting silver from beneath.  Last wearing I hid some of those cracks under jeans.  Worst case scenario, should this continue to progress to a less attractive state, I still have a sander and half a can of spray paint available for round three!  

wearing the shoes with a "dress" that is actually my aunts Liz Claiborne skirt circa 1980s belted with calvin klein and accessorized with FoundryM